

Whether you're tailgating, hosting a party, or just looking for a tasty sandwich, these Pesto Chicken Parmesan Sliders are drool-worthy and perfectly cheesy!
For the longest time, the only sliders I ever pictured were from White Castle. Over the years, as they have become more popular, I've come to appreciate that almost any good comfort food can be turned into a slider. Today's recipe for Pesto Chicken Parmesan Sliders is no exception. Instead of pasta, they're served on buns. As an added bonus, they have aromatic pesto and fresh mozzarella for a delightful boost of flavor. Want to cut down on the time it takes to make it? Don't worry, you can get the tomato sauce, pesto, and chicken all ready-made (or easily reheated) from the grocery. A perfect game day appetizer is at your fingertips.
Skills & Techniques
These Pesto Chicken Parmesan Sliders can be made extra fancy by brushing up on these cooking techniques and making everything from scratch.
- How To Pan-Fry. Get the extra crispy crust on the chicken by mastering pan-frying. Find out everything you need to know from how to stay safe, to how to clean up the splattered oil here.
- Tomato Sauce. This is the recipe for one of the five french mother sauces: tomato sauce. The pork renderings and deep flavor in this sauce really elevate these sliders to a new level.
- Pesto 101. Get my favorite pesto recipe as well as tips for making it in a mortar and pestle or a food processor.
Storage and Leftovers
If you have leftovers of these Pesto Chicken Parmesan Sliders, they'll keep in an airtight container in your refrigerator for up to three days. The biggest difficulty with them, is that the buns begin to get soggy the longer they're in there.
To reheat them, I recommend:
- Preheat the oven to 400°F
- Place the sliders in a lightly oiled pan and cover it with aluminum foil.
- Bake for 20 minutes or until heated through.
If you brush the slider with some fresh butter and add a little bit of parmesan cheese on top, it will help make the Pesto Chicken Parmesan Sliders seem more fresh. Additionally, if the bottom bun has gotten too soggy, you can reheat the sliders in a preheated cast iron pan; it'll help crust them up a bit. Just be careful that you don't burn yourself putting them into the hot pan.
Pesto Chicken Parmesan Sliders
The real tip for success with these sliders is mastering the thickness of the chicken when you're flattening it. The more precise you are, the more evenly it will fry. This also prevents it from overcooking or from having large bumps in your sliders. If you would rather, you can substitute the chicken for frozen breaded chicken that you bake off prior to cooking to save you time.
Also, these sliders are incredibly filling. My husband, who normally can eat half a pan of sliders himself, stopped at two.
Get your free printable grocery list for this Pesto Chicken Parmesan Sliders recipe HERE.
This grocery list has everything that you’ll need to make this Pesto Chicken Parmesan Sliders recipe. To make grocery shopping simple, each ingredient is listed in easy-to-find grocery store amounts. If there is no amount specified, that means that you can buy the smallest (or largest) container available and still have plenty left over.
If you would like to try some other game day (or appetizer) favorites, I recommend:
- Crab and Artichoke Stuffed Zucchini
- Chicken, Bacon, Spinach, and Artichoke Stuffed Mini Hand Pies
- Fire Roasted Jalapeno Cheese Ball (coming soon!)
Happy Cooking! 🙂
Pesto Chicken Parmesan Sliders
Ingredients
Breaded Chicken
- 3 eggs
- 1 cup flour
- 2 cups panko bread crumbs
- 2 Tablespoons italian seasoning
- 1 Tablespoon salt
- 1 Tablespoon freshly ground black pepper
- 1 pound chicken breasts, smashed to ½" thickness
- 1 cup neutral cooking oil, plus more as needed
Sliders
- 12 slider buns
- 1 cup pesto
- 1 cup tomato sauce
- 1 cup parmesan cheese
- 6 Tablespoons butter,, melted
- 6 ounces fresh mozzarella ball,, sliced ¼" thick
Instructions
Breaded Chicken
- Using three different pans, separate out the flour into one, the eggs into another and the panko bread crumbs, Italian seasoning, salt and pepper into the the last. Use a fork to scramble the eggs and set aside.
- Using a meat mallet (or the back of a pan covered in plastic wrap) smash the chicken breasts until they reach about ½" thickness. Pour the oil into a heavy bottomed pan and put the heat over medium high.
- While the pan heats, coat one of the flattened chicken breasts in the flour, then transfer it to the eggs and coat both sides with the eggs. Lastly, transfer the chicken to the panko and make sure the chicken is throughly caked.
- Once the oil has gotten hot enough that a drop of water sizzles when added, carefully add in the chicken. Cook for 5 minutes or until the breading is golden brown and flip and repeat on the other side for another 5 minutes or until chicken is cooked through all the way. Repeat steps 3 and 4 with all three chicken breasts, adding oil to the pan as necessary to continue frying. Once the chicken is cooked, transfer it to a paper towel lined plate and set aside.
Sliders
- Preheat oven to 400°F.
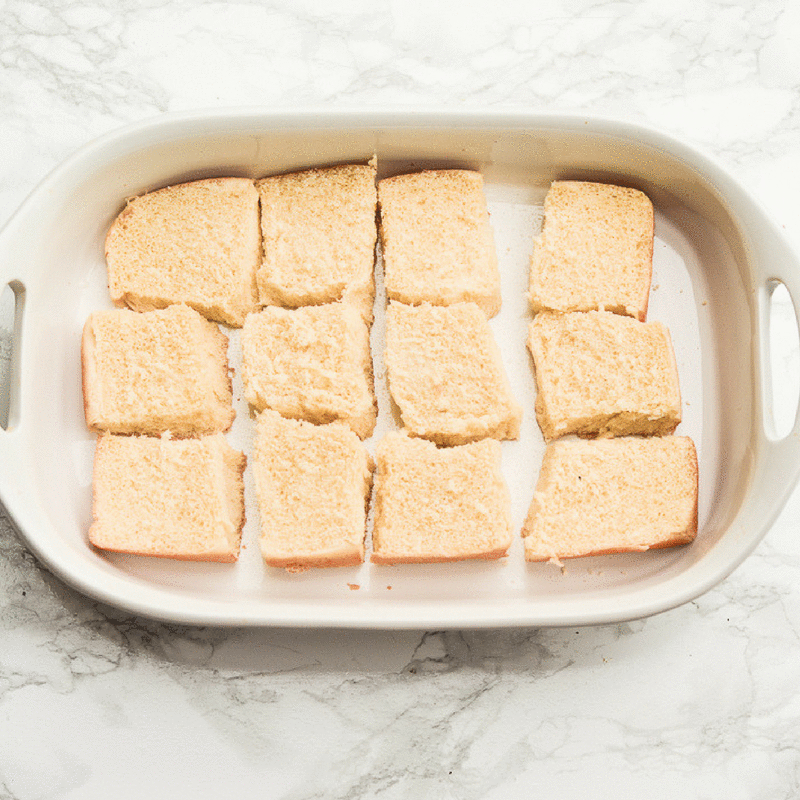
- Lightly oil the bottom of a 9x13 pan. Use a serrated knife to cut the sliders in half horizontally and place the bottom layer in the pan. (Note: You can separate the sliders like I did in the photos if you want, but it isn't necessary.)
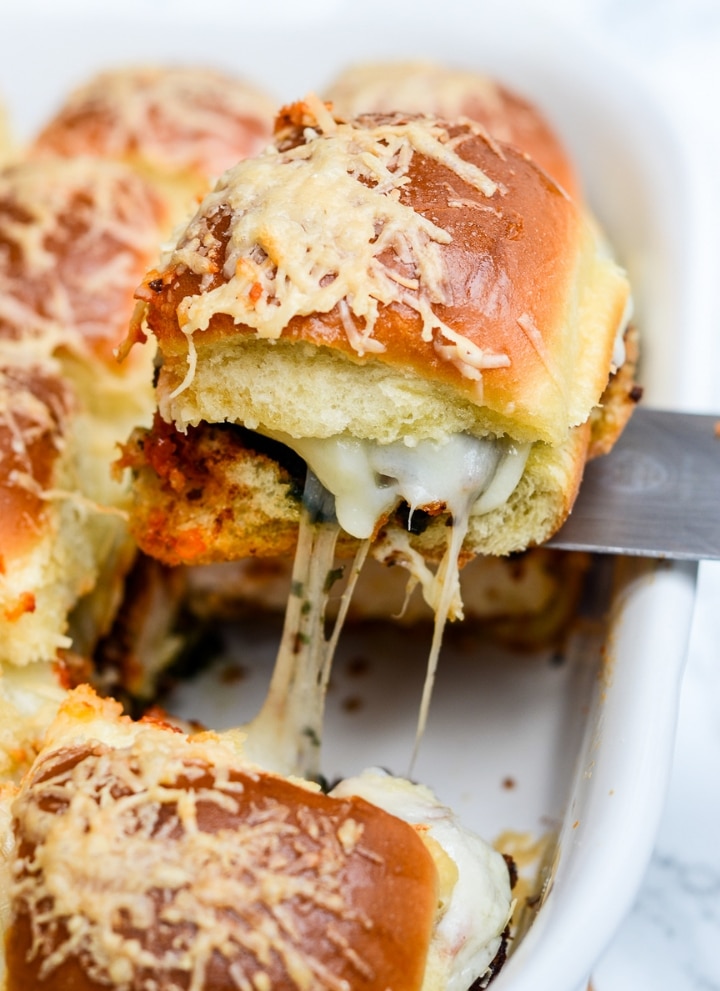
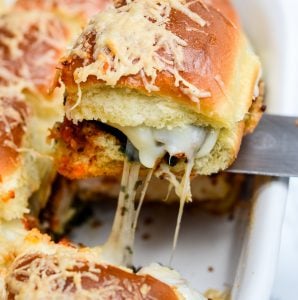
- Spoon a large spoonful of the pesto onto each of the bottom buns and spread around as needed. Layer the chicken breasts on top, followed by the sauce, sliced fresh mozzarella, and the top buns.
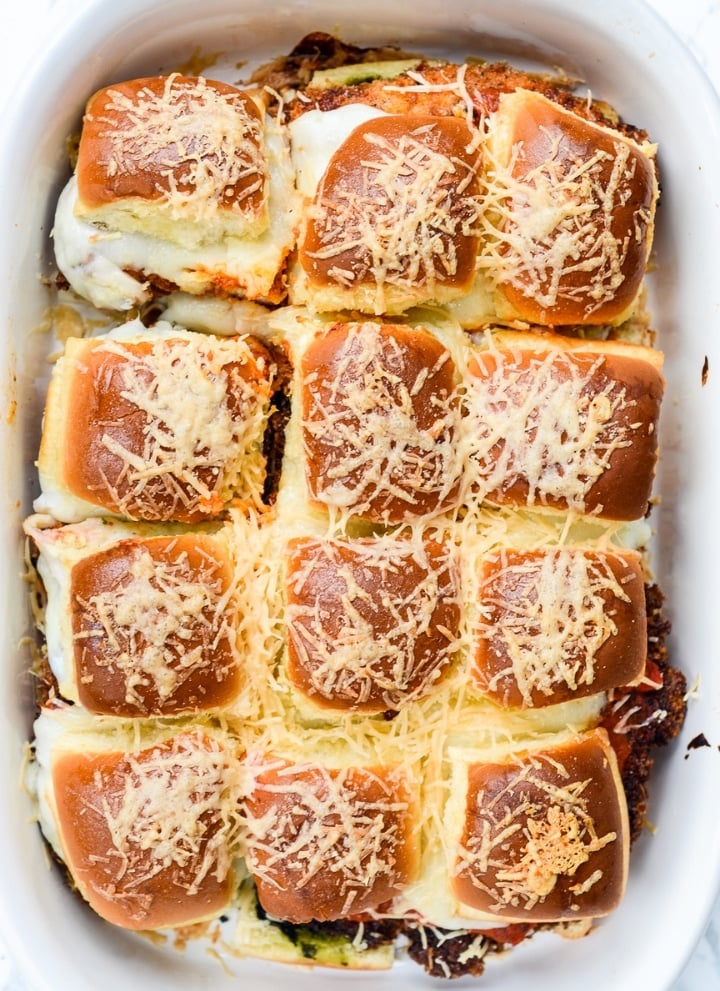
- Brush the tops of the sliders with the melted butter and sprinkle the parmesan on top. Cover the pan with aluminum foil and bake for 10 minutes. Remove the foil and cook an additional 5 minutes, or until the cheese has melted and begun to brown. Remove them from the oven and let the sliders sit for 5 minutes before serving.
Kristina says
My mouth is watering!
Mackenzie Ryan says
Me too, Kristina! I could easily eat the whole pan of these!
Debs says
These look so so so good. We don't have football in the UK but I'm gonna make these and pretend anyway!
Mackenzie Ryan says
These are definitely worth pretending for, Debs. I hope you love them.