
Learn how to blanch and shock and why it's useful and important to your cooking!

I've decided that learning how to blanch and shock needs more attention paid to it that I've been giving it. Prior to today, every time we've talked about it, I've just sent you over to my post about boiling. However, the more I got to thinking about it, the more I realized that I don't think that is enough information. While blanching and shocking is a simple skill, I've decided it's time to elaborate a bit because its uses go far beyond basic mise en place, and can be used for more than just vegetables!
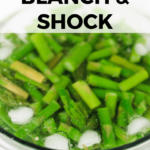
What is Blanching and Shocking?
Blanching and shocking is a cooking process where you briefly heat an ingredient until it is partially cooked (the blanching), then you plunge it into ice water to stop the cooking process (the shocking). Blanching and shocking can be used for many purposes, such as
- To partially cook something that will need to be heated up later.
- To provide a bright, beautiful color in most ingredients - especially green and white foods.
- To prevent browning during freezing or preservation.
- To remove impurities and bitterness from your ingredient.
- To help peel the skin away from the flesh of your ingredient, like tomatoes, plums, peaches, or even nuts.
When blanching your ingredient for peeling, you can make it easier to peel by cutting an "X" about ¼" deep on the bottom of the ingredient first.
While blanching and shocking is a process that is used primarily in commercial kitchens because it helps cut down on the time it takes to get your meal out to you, it can still be a very useful skill to have for the home cook. Blanching can be achieved through any cooking method, but boiling (also known as water blanching) is the most common.
What To Blanch and Shock
Almost any fruit or vegetable can be blanched and shocked, but the best ingredients for this technique are ones that are fibrous and sturdy, like, broccoli, cauliflower, beans, carrots, and brussels sprouts. If you would like to blanch and shock ingredients that are softer, or more porous, like eggplant, squash, or greens, they may be more suitable to being steamed, instead of boiled, for the blanching.
It takes 1.5 times longer to steam blanch as it does to water blanch.
I think the better question to focus on when it comes to how to blanch and shock isn't "What can I blanch?" (because the answer is pretty much everything), but rather "What do I need my blanched food for?". There are many different times where blanching and shocking may be a valuable skill to know, but I think the most important for the home cook is for prepping ahead for dinner parties, events, or holidays. It's a great way to get ahead of schedule and cut down on cooking time during your event (think, Thanksgiving!). You can use it for throwing together a quick appetizer that you want to have a slightly cooked flavor and the sensational color, or for making sure you spend more of your time with your friends and family at Easter than slaving over your stove.
Blanching doesn't have to be restricted to just fruits and vegetables, either. It can also be used to remove impurities from bones when making an excellent white stock. Or, if you like to make your own frozen meals, blanching is a great technique to use for making meals that don't go soggy; like water blanching pasta for making your own frozen chicken tetrazzini, or fat blanching (using the deep-frying method) potatoes to make a perfect crispy crust on french fries to reheat later in the oven.
Why Blanch for Freezing?
Have you ever gotten a great haul on some beautiful peaches, and after getting them home and going through the process of freezing them, notice that they turned brown and sad? That's because there is an enzyme in them that causes oxidation - just like with apples and avocados. This enzyme exists with all foods, but based on the cellular makeup of the item, the oxidation time varies. Your regular freezer takes a couple of hours to freeze the food completely (as compared to a deep freezer, or flash freezer, which can do it much faster) and during those hours you can't stop the oxidation process - it will continue until your food is completely frozen. So how do you fix that? Blanching! The brief cooking period from blanching will shut off this enzyme and help keep your produce looking fresh and it's best (it doesn't fix the process of it getting soggy after being thawed, though)!
TIP: Make sure that your fruits/vegetables are completely dry before freezing to prevent freezer burn and allow for quick freezing.
How to Blanch and Shock
Blanching and shocking is a relatively easy process, here is how to blanch and shock:
- Ice bath. Make an ice bath by filling a large bowl half-full with ice and just barely cover it with cold water. You want your bowl to have more ice than water because the heat from the foods you are blanching will melt the ice and warm up the water. The water needs to be VERY cold to stop the cooking process, so if you are working in batches, make sure to have extra ice set aside in the freezer, and don't be afraid to dump your bowl and start fresh when needed.
- Boil. Set aside the bowl and set a large pot of salted (this is important for preventing nutrient leakage) water to a rolling, heavy boil. Make sure that there is plenty of room for your food to move around. If you don't have enough water, it can cause uneven and slow cooking. Try to have at least 1 quart of water for every cup of food being blanched.
- Ingredients. Prepare your ingredients by cutting them into uniform sizes for even cooking. You don't want some pieces to get overcooked - so this is an important step.
- Blanch. Drop your ingredient into the water and cook for the necessary amount of time. NOTE: Depending on what your end goal is with your blanching and shocking, your cooking times will vary. See below for a guideline to help determine your cooking time:
- If you are blanching and shocking for peeling, you only want to cook your ingredient for long enough that only the outside layer is cooked, around 30-60 seconds.
- If you are blanching to brighten the color of your food, you only need to cook it long enough to see the change and lock it in - around 30 seconds.
- If you are blanching to prepare your food to be cooked later, you only want to cook your ingredient until it hits an al-dente texture - around 1-2 minutes.
- If you are blanching for preservation, like freezing, here is the website National Center for Home Preservation, which gives you guidelines for how long to cook your food to ensure proper care is taken.
- Shock. Remove your ingredient from the heat as quickly as possible and immediately submerge it into the ice water, making sure that there is enough ice water to cover the ingredients completely. Let it set there until the food is completely chilled, about 5 minutes.
- Set Aside. Strain the ingredient from the ice water, let them dry, and store them appropriately for later use.
I know that looks like a lot of steps, but after you've done it once or twice, you'll find the process extremely easy to do.
TIP: Keep your bowl of ice water for shocking in the freezer between uses to keep the water as cold as possible. The steam from the boiling blanching water can cause your ice to melt and water to warm up too early if they are kept close to each other.
Practice Makes Perfect
Now that you know how to blanch and shock, if you would like to put your new skills to good use, here are some recipes I recommend:
Thanks so much for stopping by! I hope that this in-depth look at how to blanch and shock has proven informative and worthwhile!
I love the see the creations your making in your own kitchen using the techniques explained here! Show me a picture of what you're blanching and shocking on social media - @foodabovegold, and use our exclusive culinary hashtag #CallMeMichelin.
Happy Cooking! 🙂
Corene says
Thank you! This is SUPER helpful. I've been dappling in blanching (hadn't tried shocking -- at least re: food ;)) and had mixed results. I'll be referring to this post from now on.
Mackenzie Ryan says
Yay! I hope that it helps! 🙂