

This simple summer cheese board has light and flavorful cheeses and produce to celebrate the best of the season. Make it your own with some easy tips!
A simple summer cheese board takes the stress off of you during a cookout, or elegant get together. Assemble all of the different pieces
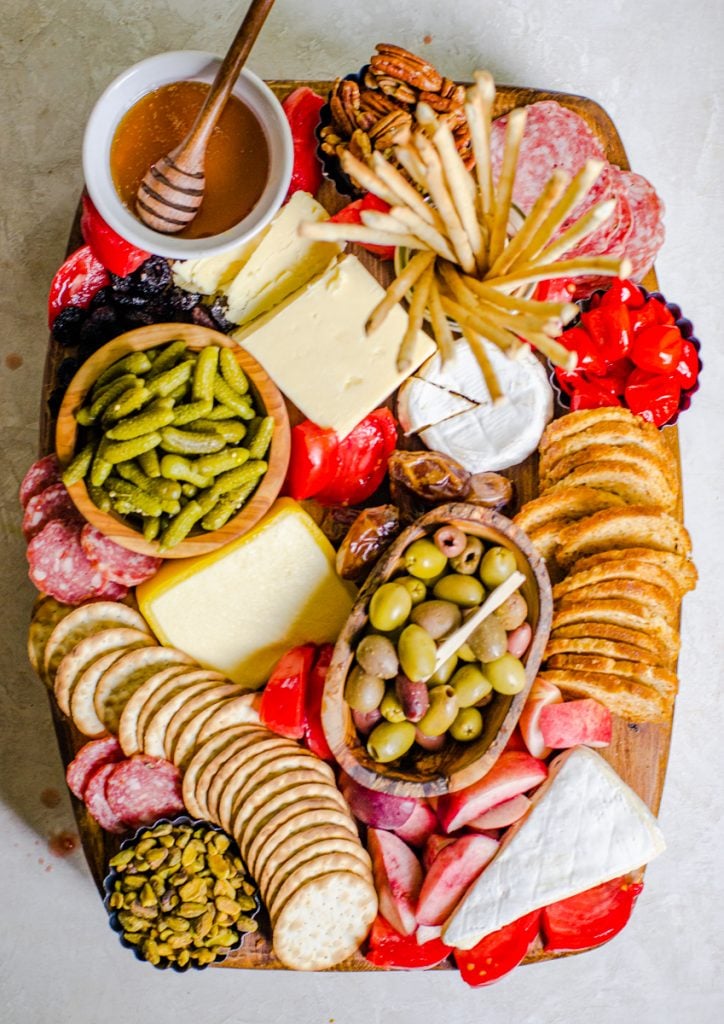
What Kind of Cheeses?
For a simple summer cheese board, I recommend sticking with cheeses that are light in flavor. Choose between three and five variations depending on how large your board is.
Some of my favorites are:
- Fresh or Soft Cheese: like a salted ricotta, chevre goat cheese, or mozzarella
- Semi-soft: like lemon Fontina, Havarti, or young Gouda
- Blue Cheese: Cambozola, buttermilk blue, gorgonzola, or Roquefort
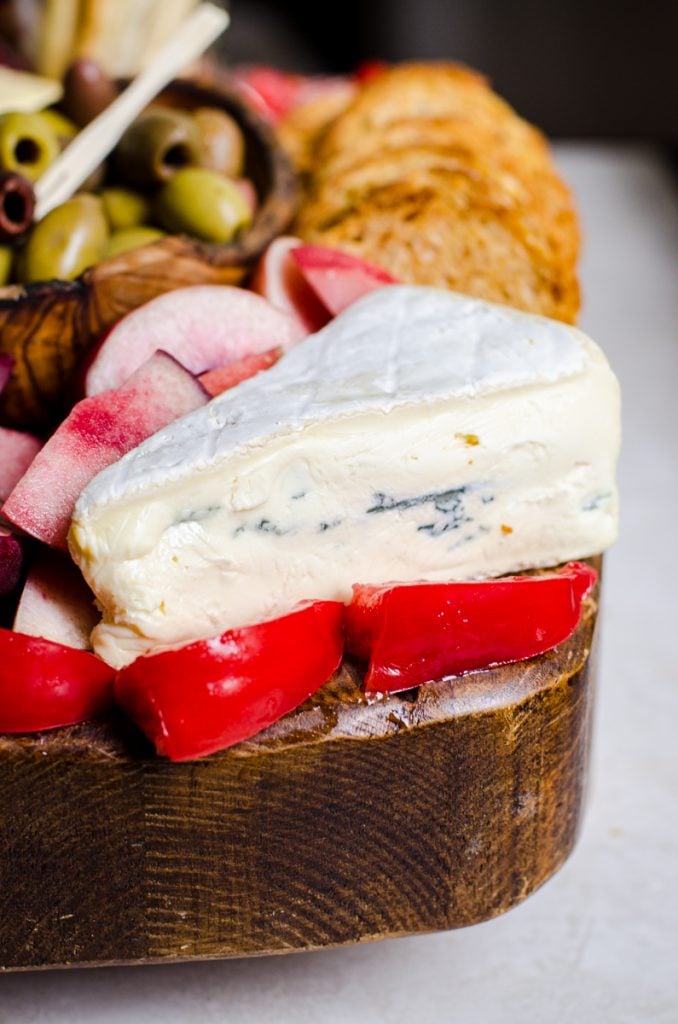
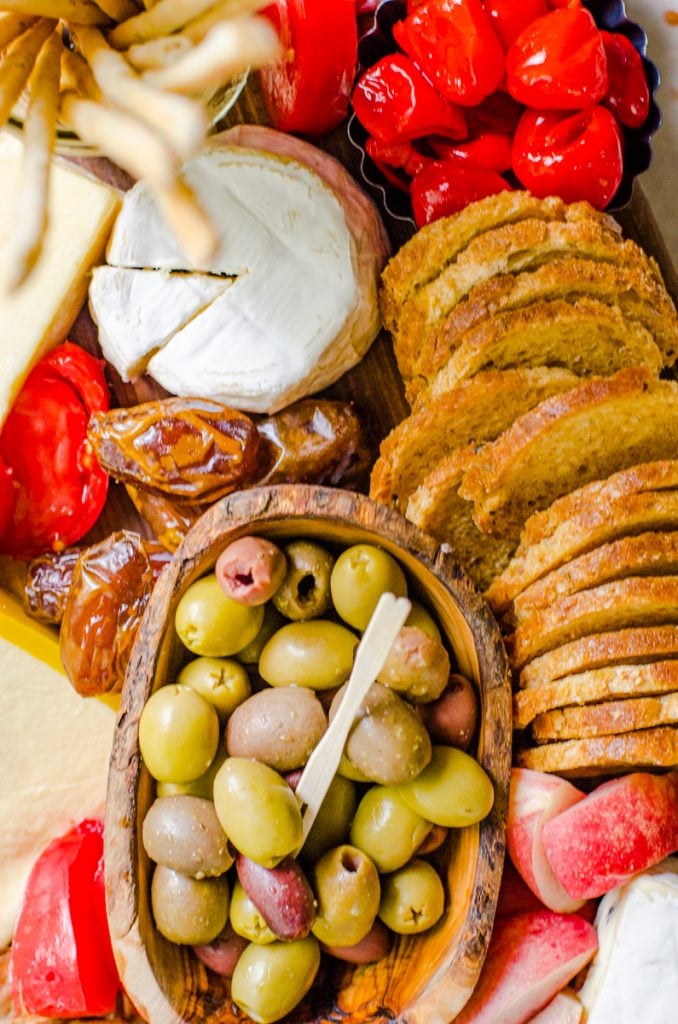
- Rind Cheese: Brie, Camembert, or triple créme.
- Hard: Parmigiano-Reggiano, aged Gouda, or a coastal cheddar. (I love the one from Trader Joes.)
There are many different flavorings and varietals of each of these cheese. For example, a summer cheeseboard can have a fontina that is wrapped in lemon curd and flavored with honey. Or, a gouda that has a bit of rosemary in it.
Should I Add Charcuterie?
Charcuterie, or cured meats, are an option for a summer cheese board but not a requirement.
If your cheese board is inside at room temperature, most cured meats and cheeses do fine. If it's outside though, try not to leave it for more than two hours or the meats sweat.
To choose meat for a summer cheese board, go with cured ones. I like salami, bresaola, soppressata, capoccolo, or even candied bacon.
Try to avoid extremely thin cuts like prosciutto because it doesn't hold up as well to the warmer weather.
What Condiments?
When serving a summer cheese board, go with flavors that are light, salty, or grilled.
I personally love to use fresh fruits and veggies, and there are so many options in summertime.
For example, you can use:
- Summer fruits like raspberries, blueberries, or fresh fruit in late summer
- Stone fruit, like nectarines, plums, peaches, or cherries
- Cut heirloom tomatoes or cherry tomatoes
- Fresh figs in the late summer
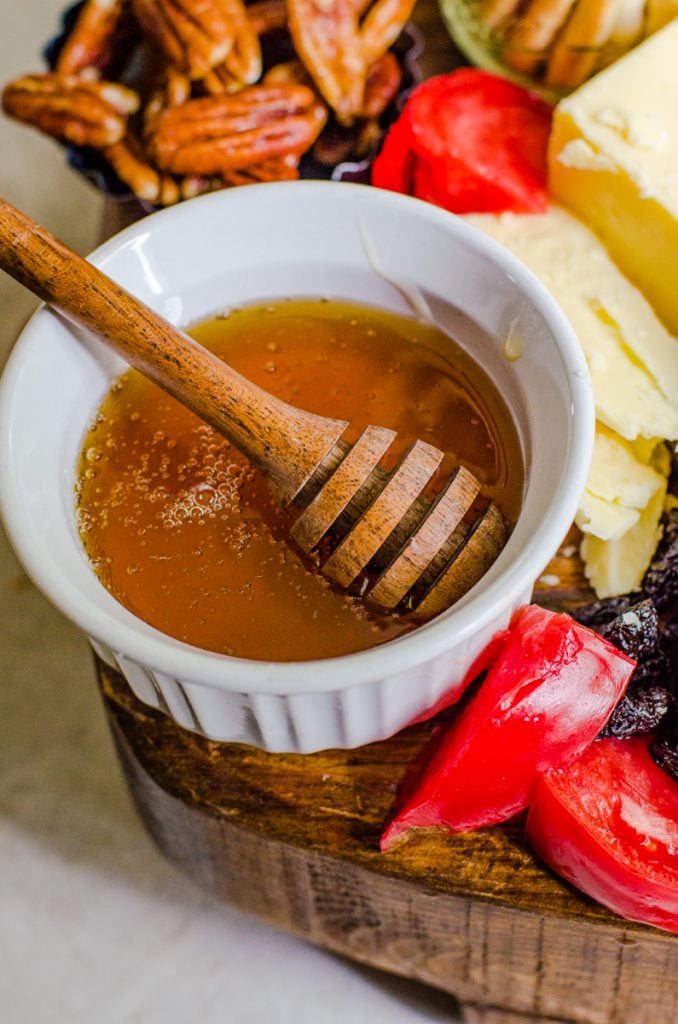
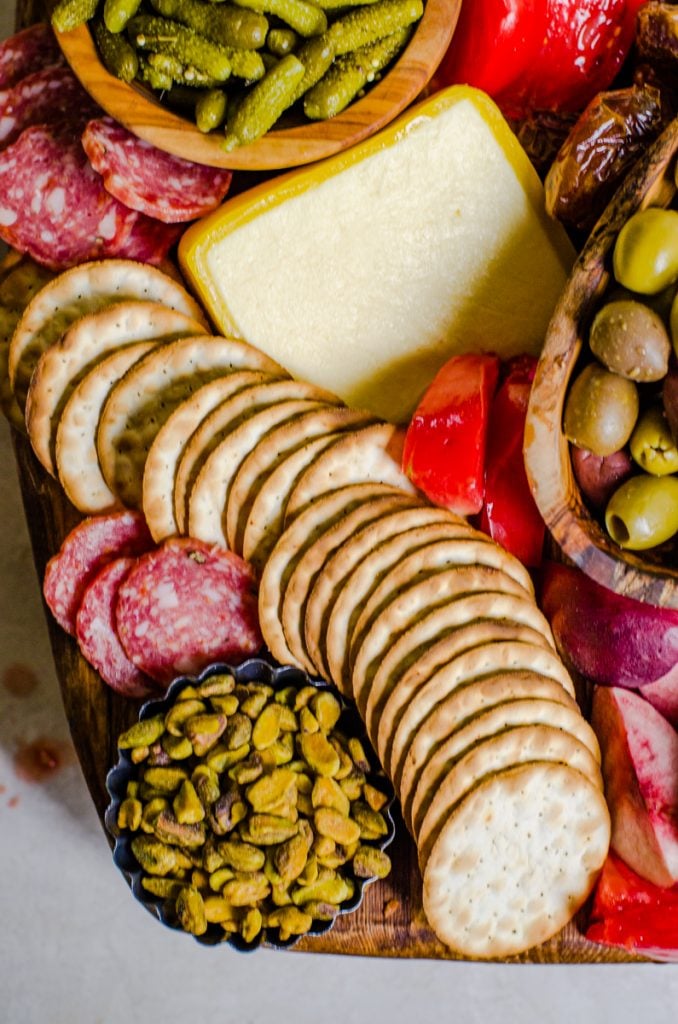
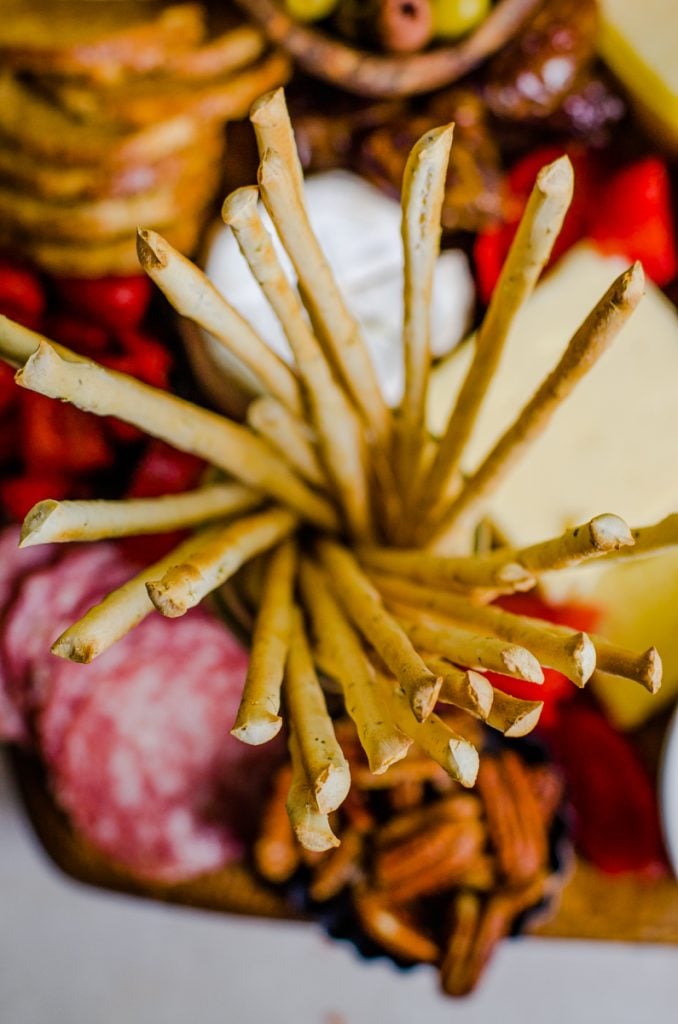
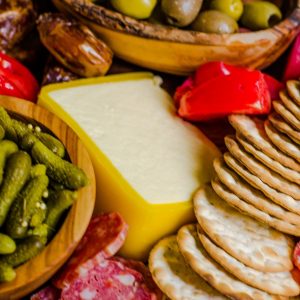
As for other condiments for this summer cheese board, I love using grilled breads, cornichons, mixed olives, sweet peppadew peppers, light and crunchy crostini or breadsticks, fig jam, honey, or jalapeno jelly.
Another really yummy option is to make a light lemon yogurt dipping sauce. (Similar to tzatziki). It makes a great spread on grilled bread, and gets mixes with olive oil for extra flavor and fat.
How Much To Serve
I find two ounces of cheese and three ounces of meat per person to be about right for a cheese platter.
As for the condiments, have enough to fill a small bowl twice. About 8 ounces of each.. This gives you enough to refill in case the summer cheeseboard begins to run low.
When it comes to breads, one package of each thing gives you enough usually. For example, one package of pre-made breadsticks, or one baguette for grilled bread.
How To Serve The Cheese board
The goal of making a beautiful summer cheese board is to fill it as fully as you can. As a result, a cutting board without a side can be tricky because the ingredients can fall off of it.
Try getting a cheese board that has a a handle and sides to make it easy to move.
I personally love the Europe2You boards that are made from reclaimed wood. They are beautiful and large enough to fit those 2-5 cheeses with ease. (I used one of their boards in my photos, even though it doesn't have either handles or sides. Do as I say, right?)
Tips For Arranging The Board
- Start with the cheeses since they are the star of the show. Remove them from the refrigerator an hour before serving so they come to room temperature. This how the flavors and textures best make their appearance.
- If you are not planning to cut the cheeses for your guests, make sure they are easily accessible and can get a cheese knife into them. Provide a separate knife or cheese plane for each. You can also provide cheese labels. This is especially helpful for busy gatherings where you can't explain it to each guest.
- Next, add the bowls for the condiments to your summer cheese board. You don't have to fill them yet, just find the spots where they fit nicely.
- Now add the breads. For visual interest, make sure one of the cracker or bread rows you have moves fluidly like water. It should curve around something else, like one of the bowls.
- Lastly, add in the fresh ingredients like fruits and veggies. If you can leave them whole like cherry tomatoes that is better than an heirloom tomato that leaks juice. Try putting those in a bowl instead.
- Don't forget a clean and approachable way for the guests to get their goodies. A spoon, small tongs, or olive pick for each of the items helps the guests move along swiftly.

Summer Cheese Board
Even though this summer cheese board is variable, I gave general guidelines below in the recipe. The two most likely cheeses to get discarded due to a lack of enjoyment I put in as "optional".
Happy Cooking! 🙂
Simple Summer Cheese Board
Ingredients
- 8 ounces fresh or semi-soft cheese, optional
- 8 ounces rind cheese
- 8 ounces blue cheese, optional
- 8 ounces hard cheese
- 8 ounces sem-soft chee
- 3 types types of bread, like crackers, baguettes, crostini, or breadsticks
- 2 pounds charcuterie meats
- 3-5 condiments
- 2 pounds fresh fruit or veggies, split between 3-5 varieties
- 8 ounces almonds, or other nuts
Instructions
- Begin by arranging the cheese where you want it. Then add some small bowls to hold the condiments. Leave a little bit of the liquid in each bowl so the condiments don't dry out.
- Spread out the bread, nuts, meat and fruit to fill in the spaces. Remember, the more full the summer cheese board is, the more appetizing it looks. It's okay to be crowded.
- Let sit at room temperature for one hour before serving to get the most flavor out of everything.
Notes
- Try to have the cheese board sit out for no more than 3-4 hours or the meats begin to get crusty and the breads become stale.
- Once done with the summer cheese board, cover it with plastic wrap and return it to the refrigerator. Use again another day.
What are your thoughts?