

Make the ultimate homemade frozen treat by mastering how to make a custard ice cream base. Plus, the best vanilla frozen custard recipe, and a recovery hack for if the base curdles!

Let’s be honest from the beginning: making custard ice cream is time consuming. The results, however, are proof of the difficult work.
You get a creamy, dreamy, luxuriously smooth ice cream that begs to be eaten. It calls to you in your dream and whisks you away to pleasant places during the day. But more than anything, it tempts you to make poor choices about portion size.
What Is The Difference Between Frozen Custard and Ice Cream?
Custard and ice cream are made of the same three basic ingredients: milk, sugar, and cream. The difference between the two is that custard also has cooked egg yolks in it that provides a silkier texture. Depending on the recipe, standard ice cream may not be churned in an ice cream maker while custard always is.
Custard gives you the classic texture reminiscent of old fashioned ice cream; super smooth, thick, and decadent. Whether you’re making something fancy, or a classic vanilla ice cream recipe, a custard base gives you the best result! Plus, as an added bonus, custard ice creams don’t get freezer burnt as easily. This is because the water particles are fewer and smaller and the eggs work as an emulsifier to contain the water.
When To Use Frozen Custard
I would say that more than anything, it comes down to what kind of ice cream you’re making. The more luxurious and indulgent, the more likely to use custard.
Think of elegant or regal flavors that the custard will help bring out.
- vanilla bean
- dark chocolate
- dulce de leche
- salted caramel
- white chocolate.
It’s also nice to use a custard base when you’re adding in flavors with a high amount of water. ( Peach, mango, or lemon for example.) The egg yolks help capture the water and make the ice cream less watery.
Using a Double Boiler
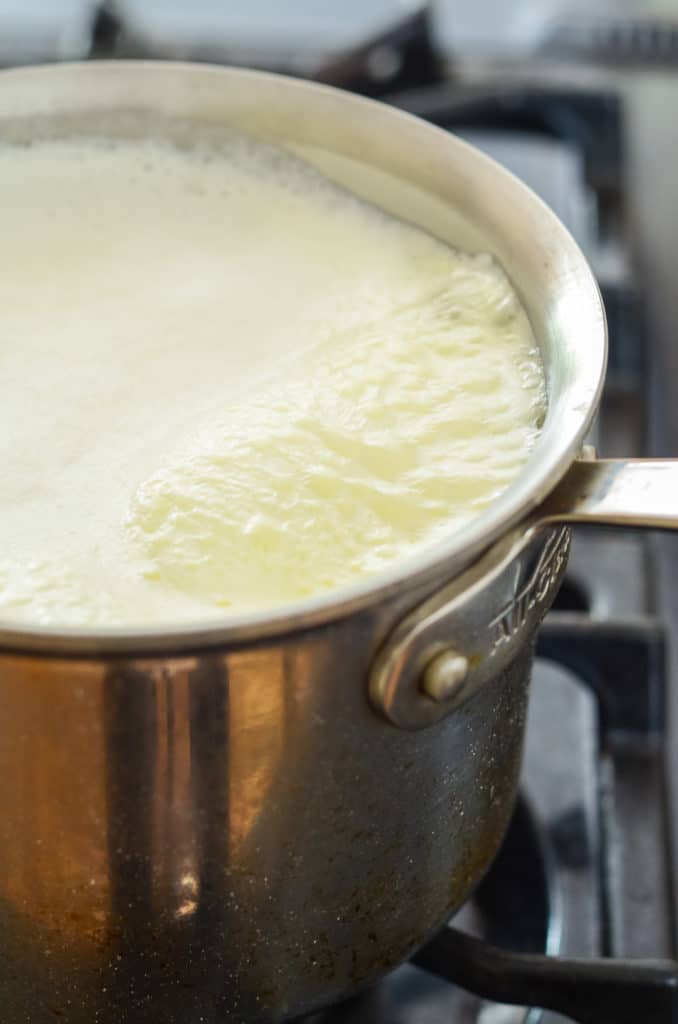
You don't have to own a fancy double boiler to make custard ice cream at home. A simple deep pot or saucepan with a glass bowl that fits tightly on top will do. (Avoid using a metal bowl, as it can discolor the egg yolks and make your ice cream dingy.)
The purpose of the double boiler is to cook the egg yolks without turning them into breakfast food. This is done by using trapped steam between the bowl and a small amount of water in the heavy saucepan.
If you're new to using a double boiler, I recommend medium low heat. If the water begins to go above a light simmer, you run the risk over overcooking the eggs. Again, this is a little time consuming, but it is so rewarding.
You only need an inch or two of water in the pot. Once the water is to the light simmer, your double boiler is ready to use.
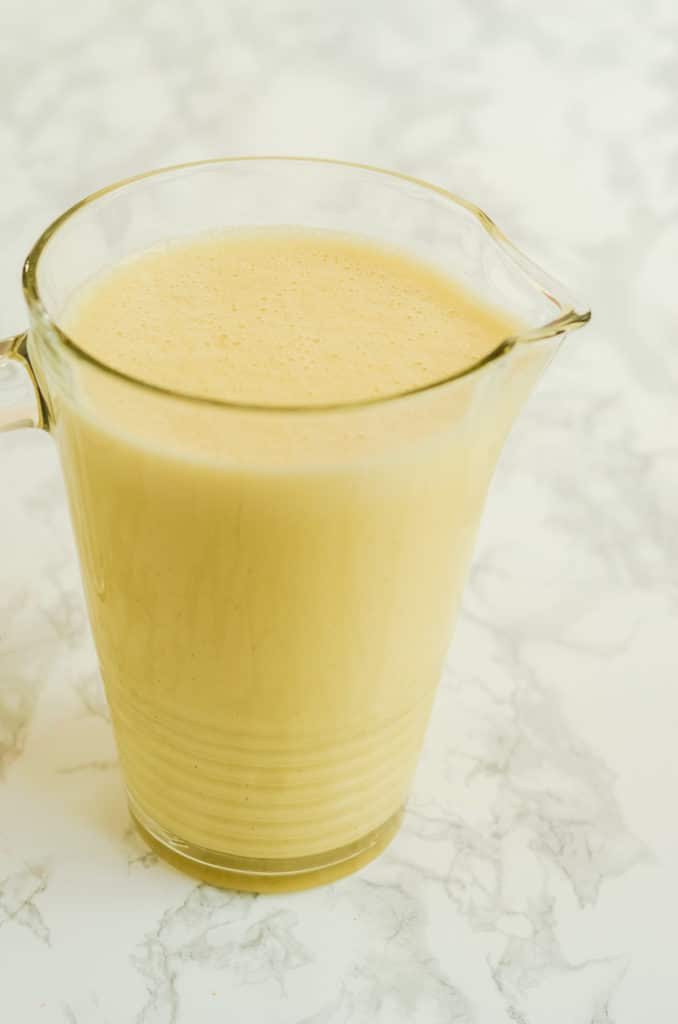
Unlike some other recipes, this one uses the scalded milk mixture to begin cooking the eggs. This is called tempering. By slowly adding in the heated liquid, it begins the cooking process at a slow rate. Once it is all incorporated, the large bowl can be placed over the simmering water.
For the best results when using a double boiler, I recommend whisking constantly. However, there is a catch. As you whisk, it pushes the custard up onto the side of the bowl which cooks it. Whisk slowly and purposely to prevent this.
Once your custard ice cream base is cooked, remove the bowl from the heat. Stop the cooking process by adding in the cold cream and vanilla, stirring occasionally to help it cool. Now you're ready to strain the homemade ice cream, cover it with plastic wrap, and chill overnight.
How To Recover Curdled Custard
Temperature control is key when preparing custard. There is a fine line between silky custard and scrambled eggs.
Tip: keeping a well-calibrated thermometer in the bowl at all times helps this. (You can double check the calibration by putting the thermometer in a glass of ice water. It should read 32°F.)
As soon as the temperature hits 160°F, shut off the heat and remove from the heat. If you let your custard base rest over the burner, the residual heat can take your base over that fine line.
If the unexpected happens and the eggs end up scrambled, all hope is not lost. I have a recovery hack that works excellently every single time.
To recover a curdled custard ice cream base cool the custard to room temperature. Place it in a blender and blend on medium-high for 15-30 seconds or until it is once again smooth.
Blending your curdled ice cream base breaks down the egg into teeny-tiny pieces so it won’t impact the texture. The ice cream may taste bit more “eggy” than if it hadn’t curdled. But nine times out of ten no one notices.
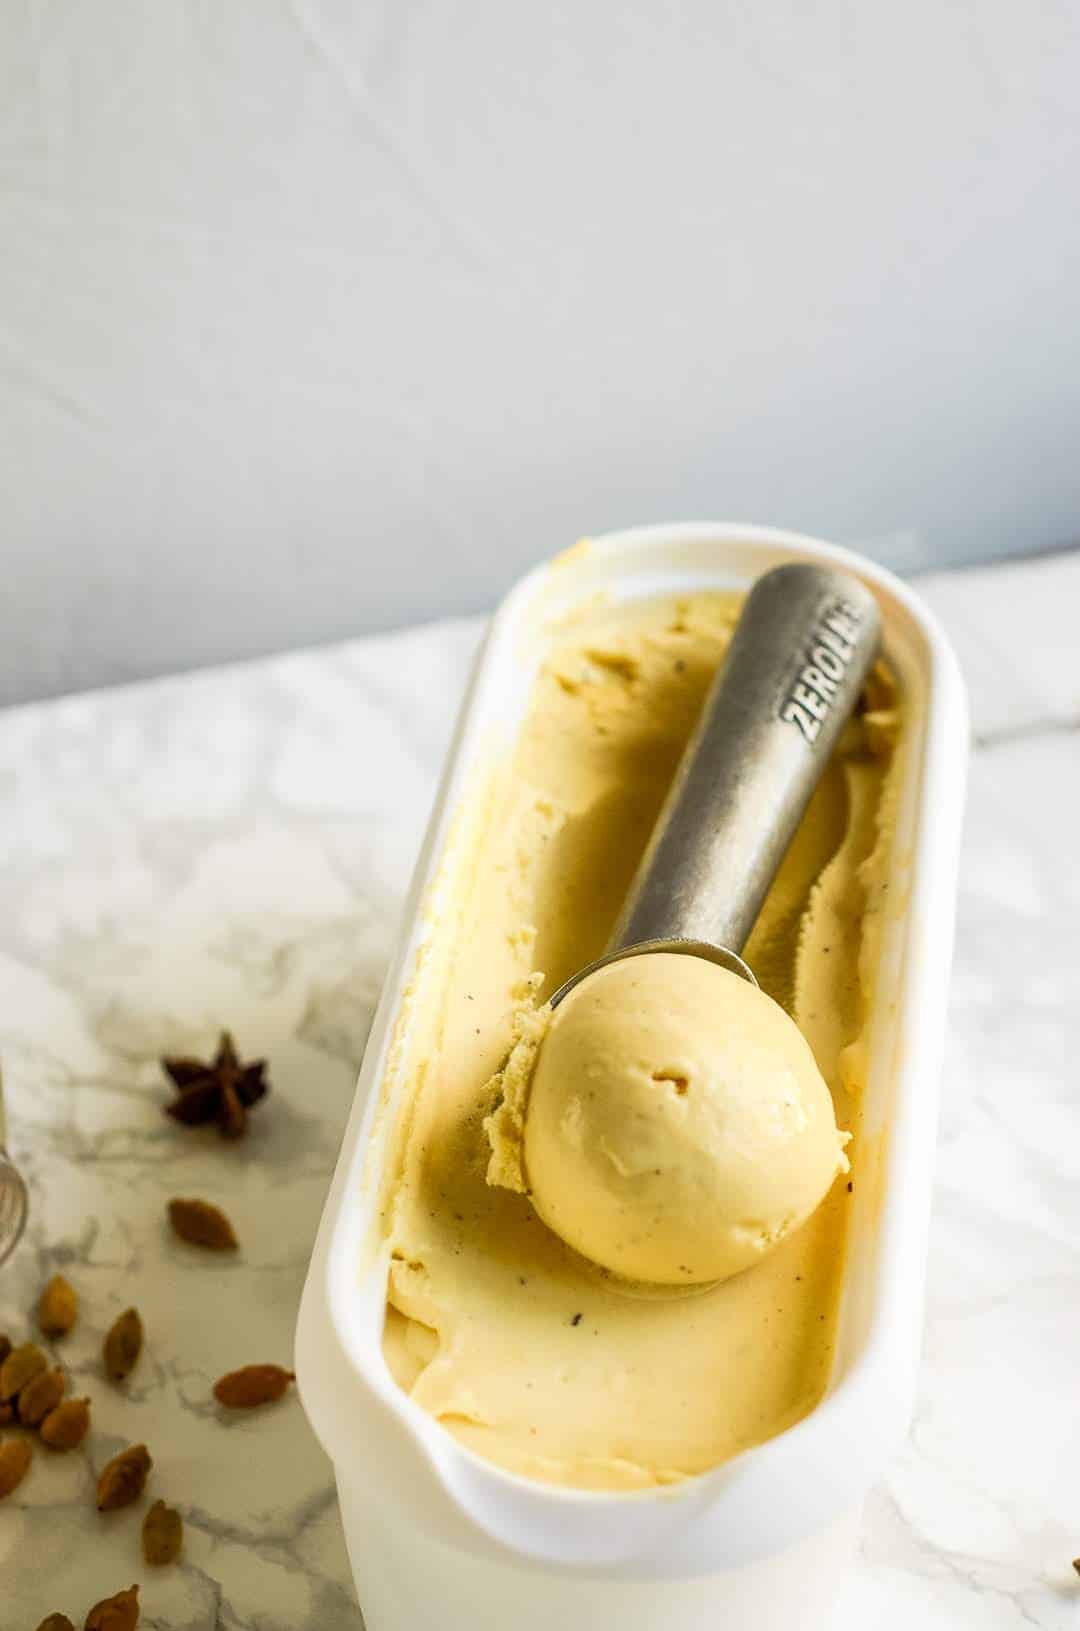
The Best Vanilla Custard Ice Cream Recipe
This is absolutely my favorite way to make custard ice cream. A lot of recipes tell you to cook the base directly in the pot. This recipe doesn't because the double boiler provides fine-tuned temperature control.
Using a double boiler gives you more temperature regulation since the base isn’t directly touching a heat source. It also gives you more ice cream at the end because less sticks to the pot.
If you would like to heat it up in a pot instead of the double boiler, no problem. I do still recommend adding the chilled heavy cream at the end to stop the cooking. This ensures your residual heat doesn’t overcook your base.
Use this printable grocery list for homemade vanilla frozen custard to make shopping simpler. All ingredients are listed in standard grocery store amounts. If no size is specified, even the smallest package will provide more than enough.
Thanks so much for stopping by!
Happy Cooking! 🙂
Homemade Custard Ice Cream
Ingredients
- 6 egg yolks
- ¾ cup granulated sugar
- 2 cups whole milk
- 1 cup heavy cream
- ½ teaspoon salt
- 1 teaspoon pure vanilla extract or vanilla bean paste, (optional)
Instructions
- Combine the egg yolks, sugar, and salt in a bowl. Whip the mixture until it becomes thick and the color turns a light yellow.
- Scald the milk in a pot, then gradually beat it into the egg mixture. If you add in too much too soon in will scramble your eggs. Take your time.
- Place the bowl over a water bath or double boiler*. Continue to heat, sitrring constantly, until the mixture is thick enough to coat the back of a spoon. (Or 160°F.)
- Immediately stir in the cold cream to stop the cooking. Add the vanilla if using.
- Chill the mixture for at least 12 hours, then freeze in an ice cream maker according to the manufacturer's directions.
- Place the ice cream in the freezer and freeze for 4 hours for a consistency similar to soft serve, or 12 hours for old-fashioned.
Notes
- If you are using a container of heavy cream that has previously been opened, make sure to scald and cool it prior to use. This will help reduce the risk of food-borne illness.
- To make a double boiler, you need a pot that can hold a bowl on top that is large enough to hold your custard base. Fill the pot with a couple inches of water, but not enough to touch the bottom of the bowl. Bring the water to a simmer and let the steam cook the contents of the bowl.
- If you add the cold cream and vanilla at the same time, the heat from the custard base will cook out some of the impact of the vanilla. For the biggest flavor impact, add the vanilla at the end.
Camille says
Hello! I have a question regarding the servings. How many pints can this custard cream base make? Thank you!
Mackenzie Ryan says
It should make two pints of ice cream, give or take. 🙂
Katie says
Hello! I just received a new ice cream maker for Christmas and I am so excited to use it. I wanted to make a custard based ice cream first and I was wondering something. How many quarts or pints does this make? I know it says 8 servings but if you had to guess, how many quarts or pints does it make?
Mackenzie Ryan says
Hi Katie! What an exciting Christmas gift. I use mine all the time and I'm excited for you to get started. I'm sure you'll love it. What flavors do you plan to make?
Depending on how much air you incorporate into the base during churning, this ice cream recipe should yield about one quart (maybe a bit more), giving you 8 one-half cup servings. That was a wonderful question, and one I hadn't though to specify, so I'll make sure to go back and add that info in. Thanks so much!
Mackenzie
Wendy says
I make a custard to make my chocolate icecream and I think it rivals Haagan Dazz. My question though is have you tried making the custard part with almond milk. I made a chocolate cream pie which is similar to the custard and it was great
Mackenzie Ryan says
I've used it to make a custard, but the texture is just slightly different. It rivals any other non-dairy custard based ice cream, but it gets icy much easier.
Paula Engle says
We made custard ice cream as kids 60 plus years ago. Want to go back to yester-year and add peaches...unfortunately, can't find anything not hard as a brick....what is your thought on canned, drained peaches.
Mackenzie Ryan says
I think this would ultimately work, but I recommend patting them dry as well. If you can find peaches that aren't canned in syrup, that will be even better. The biggest risk I think is that the ice cream may be overly sweet if you use ones canned in syrup. Let me know how it goes, Paula!
Happy Cooking! 🙂
Mackenzie
Sandy Zajicek says
Why chill 12 hours?
Mackenzie Ryan says
Hi Sandy,
Chilling the custard mixture for the 12 hours ensures that it is cold enough to freeze quickly in the ice cream maker. If the custard isn't cold enough, it will work against the ice cream maker and the bowl will begin to thaw before enough air gets incorporated into the ice cream, thus giving you an ultra dense and thick ice cream.
If you prefer the texture to be a bit more dense, then you can churn your ice cream earlier, just make sure that it is completely cooled from cooking.
I hope that helps!
Cookie says
I've been eyeing this recipe for about a week now, I decided to go for it today. It's chilling in my fridge right now so I can't comment yet on the final product. This is the first time I've made custard based ice cream and I was surprised at how easy it went. The texture is wonderful so far, I can hardly wait the 12 hours for it to chill!
Mackenzie Ryan says
Ahh!!! I love it! I'm so glad that it went so easy for you! I can't wait to hear about the finished product! Are you leaving it just vanilla, or adding in something fun?